How to Upload a Mmd Model Into Vr Char
Introduction
VRChat is a melting pot for inventiveness, and i of the primary means it'southward expressed is through avatars. From the Ugandan Duke to realistic AAA creations to floating piles of smoke. Everything is done, and anything is possible.
But today we're going to focus on a very familiar face in VRChat. The standard anime styled MMD models. A model that has become a standard in VRChat
For this tutorial nosotros're going to be using Hipster Miku, under full permission for editing and conversion by her editor, Skary 66. This is a tutorial that will only be roofing the nuts so actually any MMD model will do.
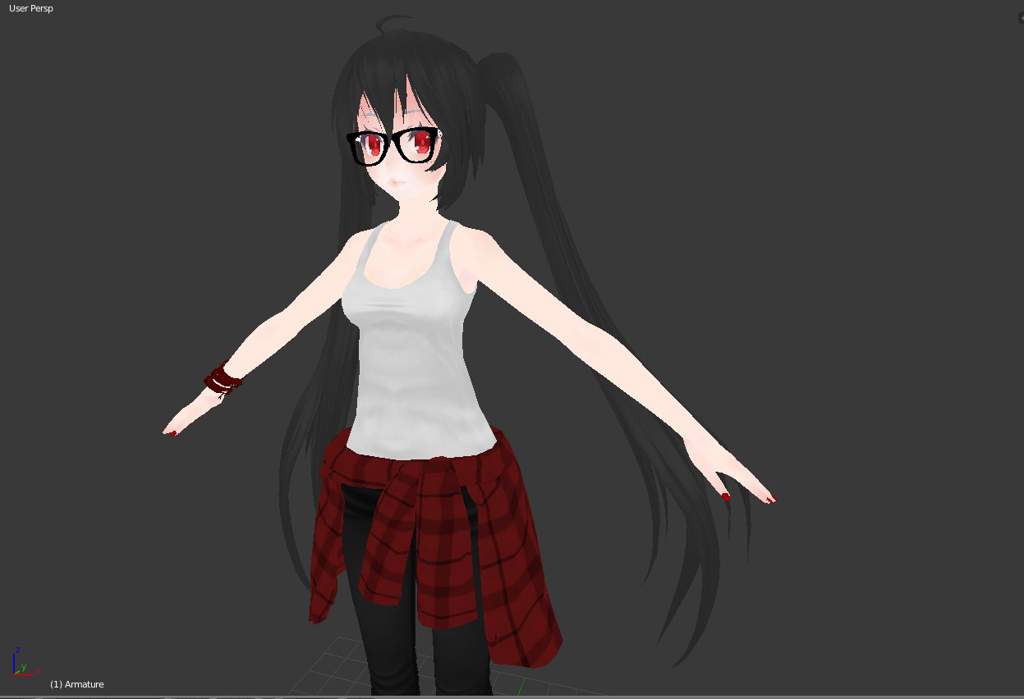

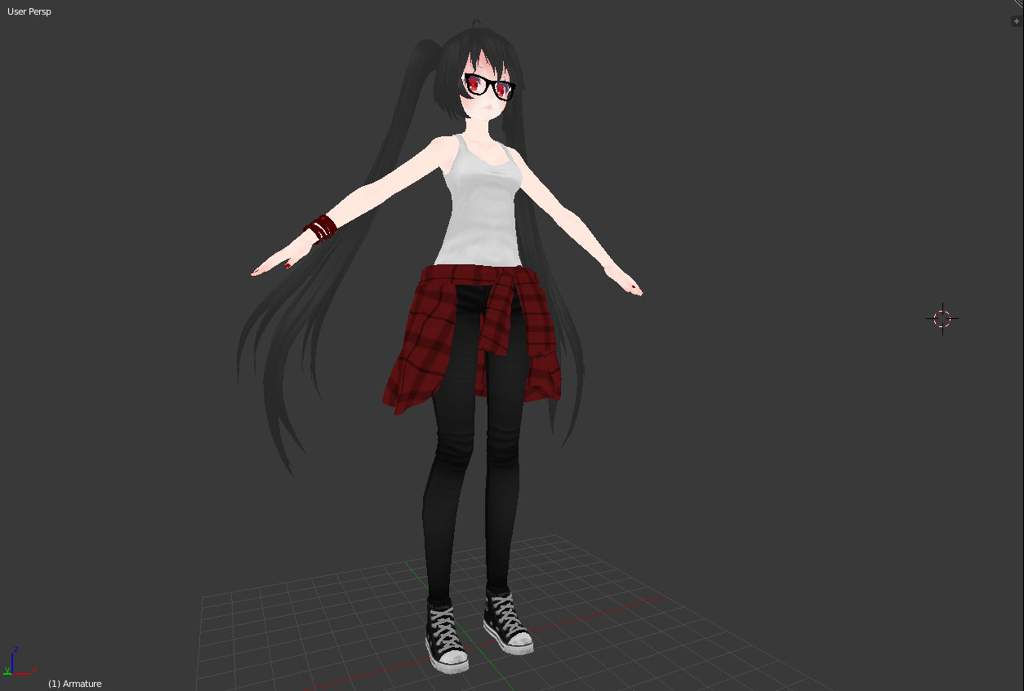
This is an edited version that I will be releasing for complimentary in the near hereafter, but the base model can exist found here
History
Maybe it's just me, just I feel like it'south always of import to sympathise the origins of a model to fully understand it. The MMD model that has become so popular on VRChat was purpose congenital for MMD by an artist and character designer who goes by the proper noun TDA (Tee-dah)
All-time known equally the designer behind Project Diva'southward Hatsune Miku Hood Module, and more recently, Kizuna AI
TDA worked under SEGA on Project Diva and his creations are licensed by Crypton Future Media.
TDA designed the TDA MMD base for MMD creators, it came equipped with everything a creator would demand, with a fully modularised skeleton and streamlined body, assuasive creators to focus on creating characters without the demand to rebuild a new model each time.
This caused explosive growth in the MMD community, more videos, more models and overall college quality content than TDAs predecessor, LAT.
Recently, for all its features, the TDA base arrived on the radar of the VRChat community, and with its premade expressions, like shooting fish in a barrel to apply and modify shape and skeleton, and loftier compatibility with a huge library of outfits online, the TDA model is immortalised in VRChat, and will probable go on to be used for as long as VRChat exists.
Now let's get to the tutorial
What you'll need:
(Everything below is explained in the previous tutorial if y'all need assist installing it)
Establish here
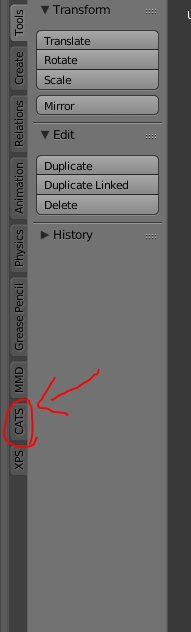
- Blender
(CATS)
- Unity Hub
- Unity 2017.1.4f1
Cubed Paradox Shaders
- VRC SDK
- The precreated MMD model, supplied by Battle Bunny Robotics
- a bit of free time.
Prepping the scene.
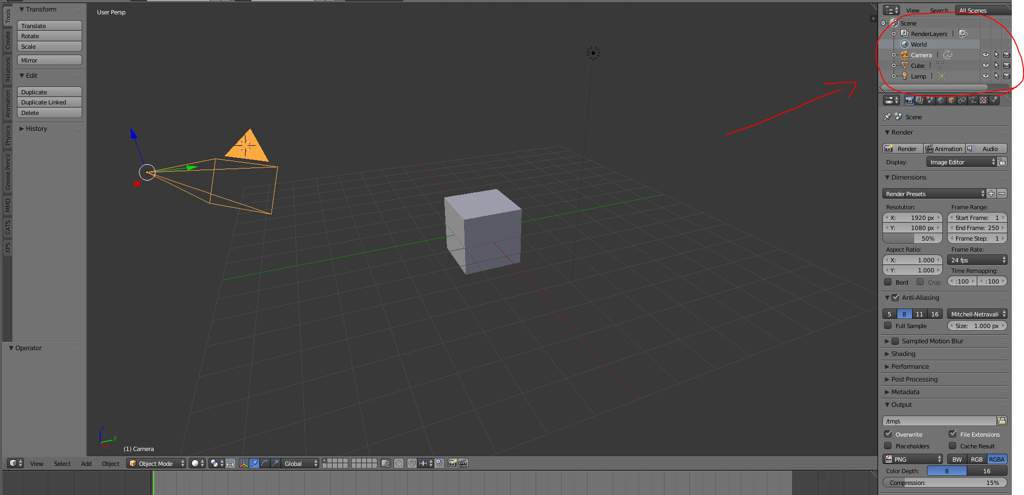
Information technology's a good idea to go rid of the default clutter that blender gives you on opening. The cube, the light, and the camera.
Here you have a few options.
The short way:
Hit A, A again. Delete, then Enter. Shortcuts are magic.
The Normal way. Select each object by correct clicking on them, hit delete, then, Enter
The extra normal way: The window on elevation right has 3 icons (picture below), Cube, lamp, and Camera. Correct click on any one of the 3 and a menu will appear. Select delete from there.
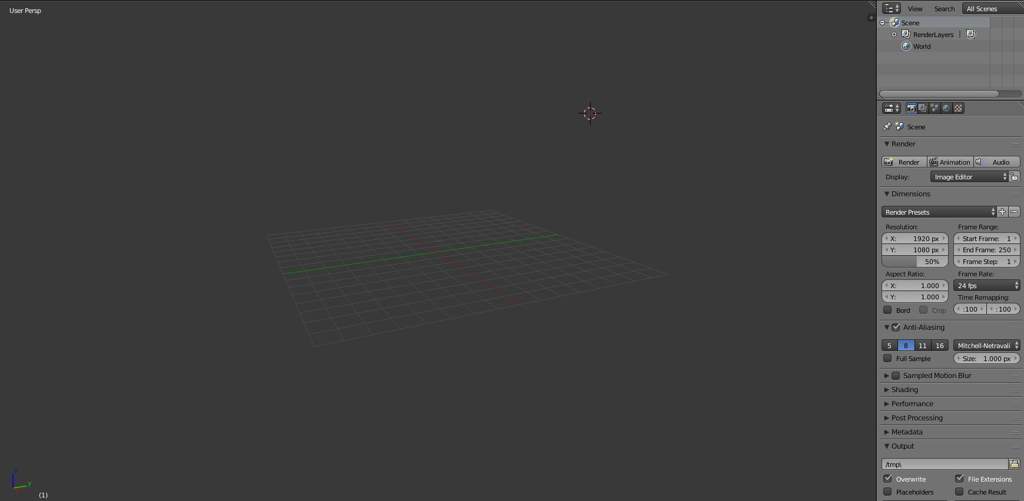
One time you have a clean scene. It's finally time to bring in the model
Importing the model
One time again, there are two methods of doing this. Lately the more favourable method has been importing the model using CATS, which is the favorable method for a few reasons, including proper scaling, and an initial cleanup of the model earlier the post-obit steps.
Then here'southward how it goes:
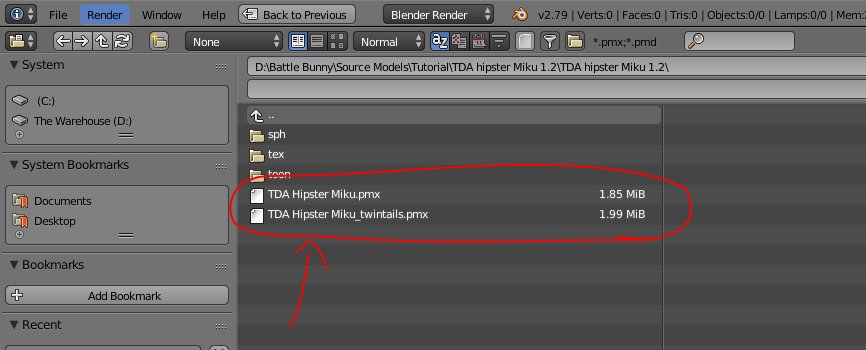
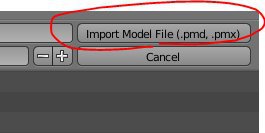
On the left side of your screen, y'all'll run into a CATS tab, open it, and wait to the superlative of the CATS window for the "Import Model" button
Once you click it, y'all'll be presented with an import window, from here. Notice the location of your model's folder, and select the .pmx or .pmd file within it, then, on the right, select "import model" or "import pmx" (or any it says)
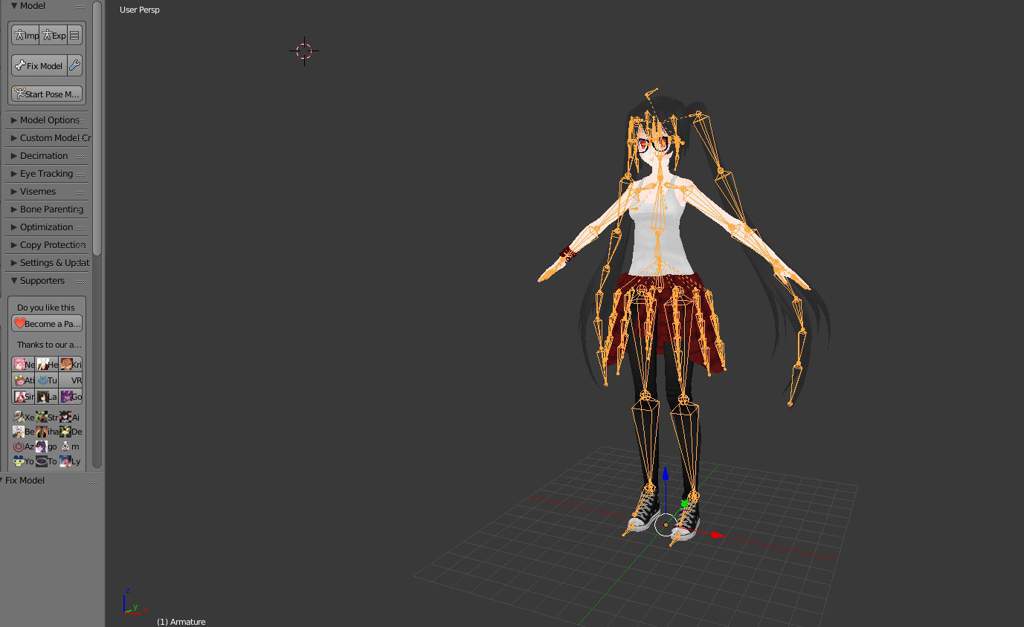
And Voilà. Y'all should be presented with a lovely, greyscale model like this:

Model Grooming
Believe information technology or not this is actually a stupid easy process for xc% of MMD models. The steps are simple merely I'thousand going to give a little more item on what each footstep does to the model
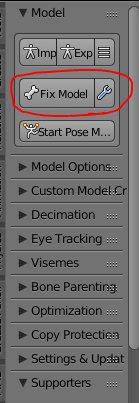
To commencement it off, in the CATS tab, right at the top, nether the "import model" option, is a big "Fix Model" Push
Once done. You lot'll be more colourful
Every step will follow a certain order, CATS was gear up upwards in this style intentionally
Click that. Basically, information technology automated about 30 mins of work y'all may have had to exercise manually.
- Deleting extra basic
- Reassigning materials and deleting duplicates
- Deleting MMD rigid bodies
- Base level optimisation
And a few other things
Note: For Full Body Trackable MMD avatars, at that place is an actress step. Click the wrench icon, and check the "Assign Total Body Tracking Fix" Box, then Fix Model
モデルを英語に翻訳する (Translating the model to english)
Being a Japanese model, it comes equally no surprise that the basic, materials, meshes, shape keys and vertex groups are all Japanese as well.
Once again. CATS is your best friend
Beneath the "Fix Model" push button are a number of tabs, and we'll get to employ all of them, but for this footstep, open the "Model Options" tab, and you'll see a big "ALL" button, under translate. Click that, and information technology will translate everything about the model to english.

---------------------------------
Decimation is the adjacent step, just won't be included in this tutorial, as information technology isn't necessary anymore for most models. But for the sake of unity. Ensure that the model is under 65,000 tris. You tin can check the model'south tri count past looking to the tiptop of your screen in blender.
If the model is over 65,000, the quick solution is to employ the quick decimate tool, set up it to 64,000 to be safe. Alternatively, employ a model with a lower tri count. The i used for this tutorial is merely shy of 32,000
---------------------------------
Center tracking, The window to the Virtual soul
Eye tracking is some form of witchcraft, handled generally by VRChat itself. Simply information technology needs to be prepared in unity.
For this, open the "Heart tracking" tab in CATS
at present there is a special step. To ensure that you don't get weird looking results with blinks. Ensure that the blink shape keys are like the picture below
- Wink 2
- Wink 2 Correct
- Ground
- Basis
If these options aren't bachelor
- Wink
- Flash Right
- Basis
- Basis
Or
- Blink
- Basis
- Ground
- Footing

Once that's done. Hit "Create Centre Tracking"
If successful, you'll meet the exam window.

Centre testing has a chance of crashing blender, and so exist enlightened of that. It isn't necessary to exam unless you're using a custom build
And so I unremarkably don't even carp with it
Final step, To speak, one needs to articulate... Visemes
Yous guessed it. Open the visemes tab
This will likely be automated, the key is to ensure that the boxes all friction match.
AH
OH
CH

Pretty easy right? Once done. Hit "Create Visemes"
---------------------------------
Bonus footstep
If you're OCD equally all of life and want to ensure you did everything right. KazE has a solution
Right click on the model. The model. Not the skeleton, and it will exist highlighted.
With that done. Await to the right of your screen for the trivial icon that looks similar an upside down triangle

Click that, and you'll encounter a few big disruptive windows. The one you lot're interested in is the shape keys drop down.
If everything was done right, you lot'll see a number of VRC shape keys, like beneath

The VRC blink, and lower lid shape keys show successful eye tracking assembly, and the vrc_aa, oh, FF etc are all visemes.
Come fly with me, to Unity :musical_note:
Going back to the first pace, next to the import model button is an export model button, it works the same way. Pick a name for your model and export
But for the sake of diversity, I'1000 going to show yous the other method, just and then you know it off hand
Elevation left of your screen. Click File, then Export, then FBX


So, you lot'll be presented with the import window, but with a few changes.
Write a proper noun for your model

And finally. Consign FBX

---------------------------------
That pretty much concludes Blender! Well done, you lot've made it through the about difficult part of the process. Side by side is Unity. The promised country, the more exciting bit.
Next Article: Unity! not Assassin's Creed, the other i
Source: https://aminoapps.com/c/vr_chat/page/item/03-mmd-to-vrchat-02/Ljxx_7ZfBIrr6o8NrEwegompJ1N5m17LJ
0 Response to "How to Upload a Mmd Model Into Vr Char"
Post a Comment